Ventoy
用Ventoy製作開機隨身碟。
安裝
在Linux上製作
從Ventoy的Github內的Assets下載Linux版的Ventoy。

下載完成後 > 解壓縮 > 開啟VentoyGUI.x86_64
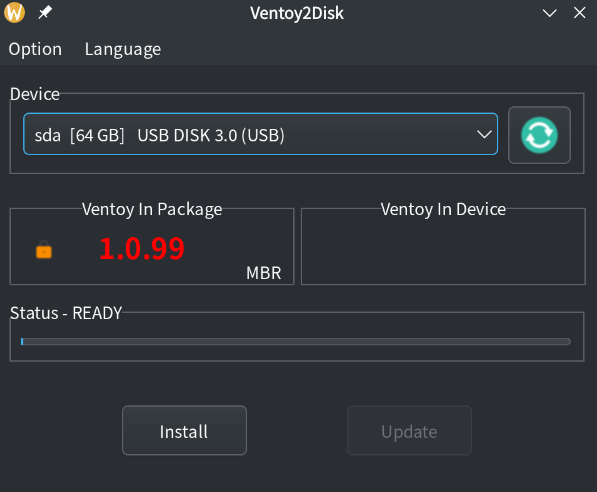
如果Device欄位沒有自動選取到你要製作的隨身碟可以點擊該欄位去做選取。
在 將隨身碟內的資料備份完成 後按下Install去製作開機隨身碟(過程中會要求使用者重複確認多次)。
iso放置
安裝完後隨身碟的名稱會變為Ventoy,之後只要在Ventoy內創一個iso資料夾並把iso檔都丟進去就可以正常使用了。
在windows上製作
從Ventoy的Github內的Assets下載Windows版的Ventoy。

下載完成後 > 解壓縮 > 開啟Ventoy2Disk.exe
剩下步驟與Linux相同。
插件
自訂主題
先到Gnome-Look下載喜歡的Grub主題。
並依照Ventoy的官方教學的教學去建立主題。
路徑關係示意。
1
2
3
4
5
6
7
8
9
Ventoy
└──iso
└──ventoy
   └──ventoy.json
   └──themes
      └──theme1
      └──theme2
         └──icons
         └──theme.txt
ventoy.json示意。
1
2
3
4
5
6
7
8
9
10
11
12
13
14
15
16
17
18
19
20
21
22
23
24
25
26
27
28
29
30
31
32
{
    "theme_uefi":{
        "file": ["/ventoy/themes/theme1/theme.txt",
                 "/ventoy/themes/theme2/theme.txt"
        ],
        "default_file": "1",
        "gfxmode": "1920x1080",
        "display_mode": "GUI",
        "serial_param": "--unit=0 --speed=9600",
        "ventoy_left": "5%",
        "ventoy_top": "95%",
        "ventoy_color": "#0000ff"
    },
    "menu_class": [
        {
            "key": "ubuntu",
            "class": "ubuntu"
        },
        {
            "key": "archlinux",
            "class": "archlinux"
        },
        {
            "key": "windows",
            "class": "windows"
        },
        {
            "key": "iso",
            "class": "iso"
        }
    ]
}
menu_class內的key是iso檔的名稱,class是圖標的檔名,系統讀取順序由上而下。
本文章以 CC BY 4.0 授權